Douglas Schuch
From:
Valencia, Philippines
|
 Posted 1 Feb 2025 4:50 am
 |
|
I recently disassembled, cleaned, and reassembled the changer of my MSA Millennium 2 changer, and made notes of the process. M2’s, M3’s, Studio Pro’s and all Legends use the same changer according to a recent reply by Johnny Cox, so that’s pretty much all the steels MSA has made this millennium! I found very little info on the forum on these, so am sharing them here in hopes others might find it useful. No doubt a lot of this will be helpful for someone with a different brand of pedal steel tackling this project for the first time. Good luck!
This is a summary of steps to disassemble and reassemble a 10-string Millennium changer. As noted above, the Studio Pro and Legend model steels by MSA use the same basic changer. I assume the 12-string changer is also the same, but do not know how many slots the mid-axle support has. NOTE: ALL ADVICE HERE IS FREELY GIVEN BUT PLEASE EXAMINE IT FULLY, CONSULT OTHER SOURCES WHERE POSSIBLE, AND USE COMMON SENSE AS I CAN NOT BE HELD RESPONSIBLE FOR ANY ERRORS CONTAINED IN THIS DOCUMENT OR BY THOSE WHO FOLLOW THIS INFORMATION.
I will start with terminology just to make sure we are all on the same page:
Split screws – these are the allen or “worm” screws that you see below the changer fingers when looking at the end of your guitar that has the window for the tuning nuts. They are in the holes in the end of the changer housing.
Pull Rods – the thin metal rods that connect from the bell cranks on the cross shafts to the changer
Tuning Nuts – the white plastic nuts that screw onto the threaded end of pull rods after it passes through the changer raise or lower tabs
Stop Plate – the metal piece at the bottom of the changer that the fingers should rest against if there is no raise or lower pull applied. On my MSA, they are polished metal with holes drilled into them.
String Finger – the aluminum part of the changer that the string attaches to and has a rounded top. This is the part that, through rotation, actually changes the pitch of the string. Note: unlike some steel guitars, the String Finger and the Finger Scissors are not attached to each other.
Finger Scissors – this is the two thinner stainless metal parts that ride on the axle beside and activate the String Finger. It consists of two parts that are riveted together to allow hinging motion between them. These two parts are:
The Raise Finger: This is the half of the Finger Scissors that the axle pass through.
The Lower Finger: Obviously, the other part of the Finger Scissors.
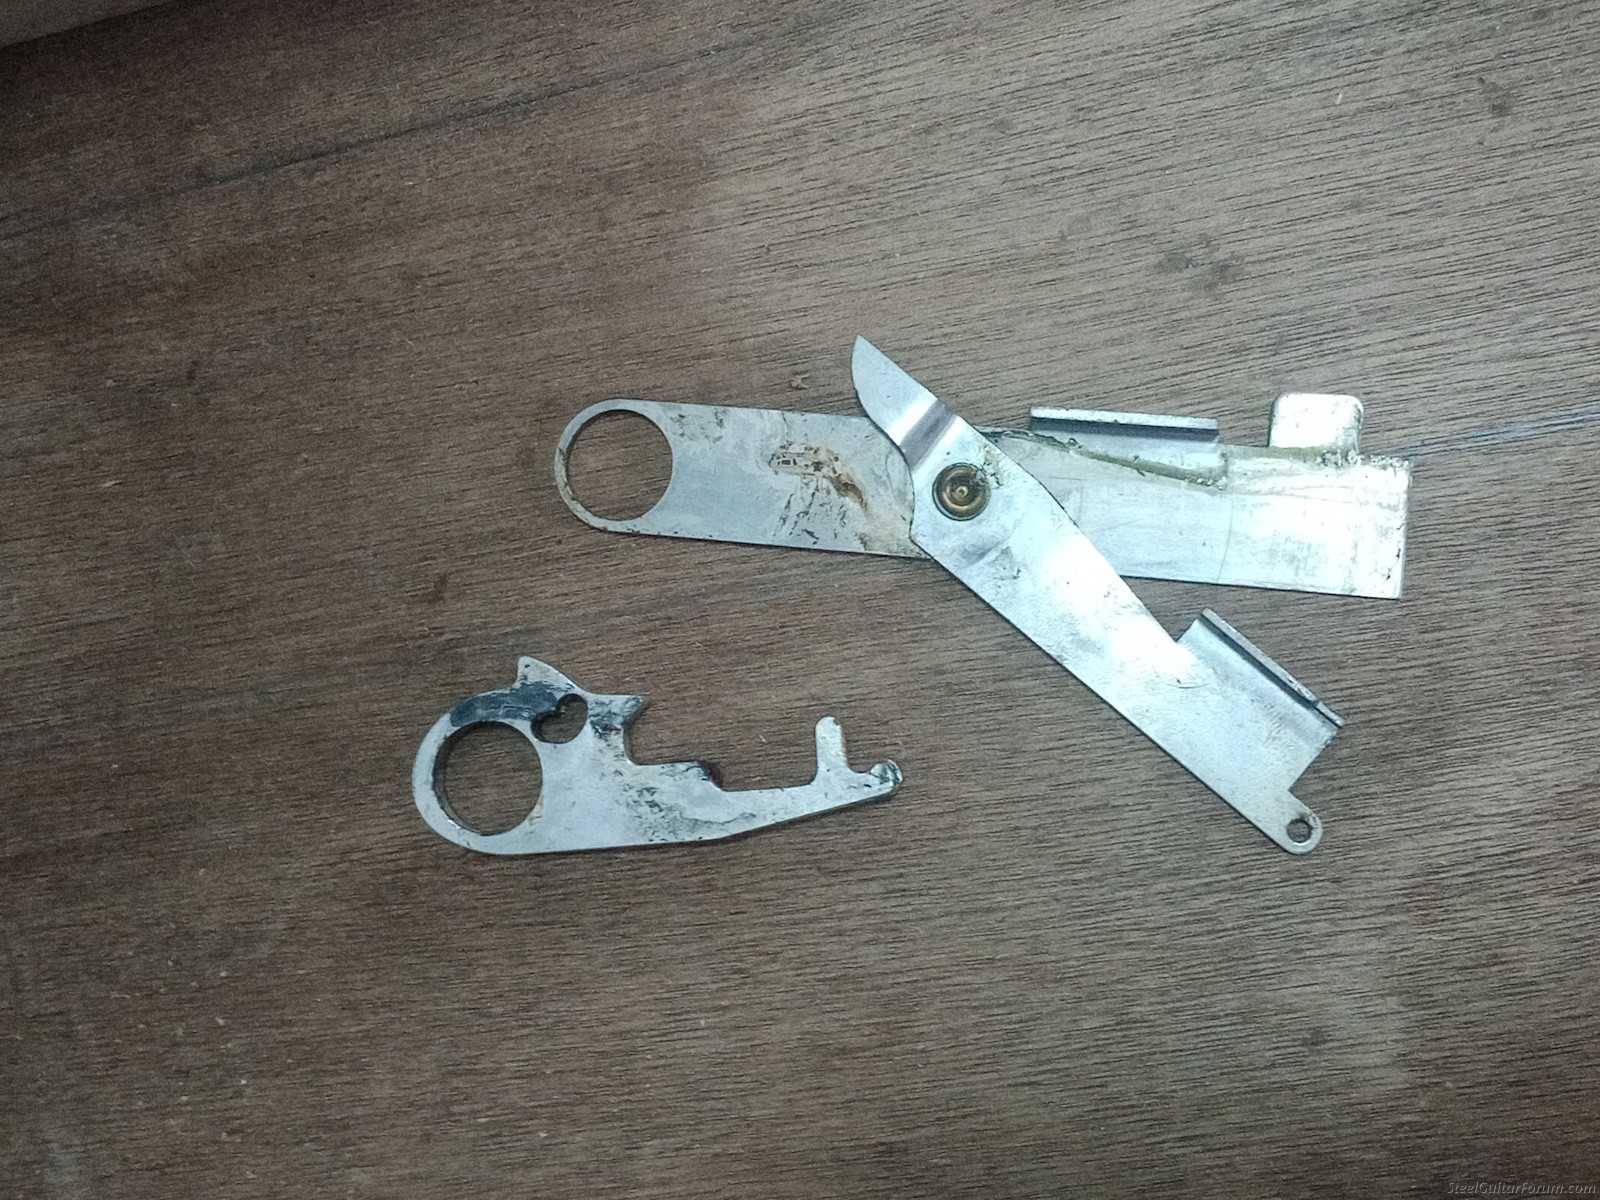
The three parts of the MSA changer finger.
Raise Tab: the part of the raise finger that is bent at right angle and and has 4 holes for pull rods.
Lower Tab: same as above, except on the lower finger, and has only 3 holes.
Balance Spring: most call these “raise helper springs”, but according to Mitchell Smithey at MSA, they call them “balance springs”. There are three parts to them: 1) the spring itself. 2) the plastic adjuster strip (white plastic with molded “balls” on it). This connects to the end of the spring away from the changer. 3) The hook. This connects to end by the changer, and the hook fits over a “nub” on the bottom of the string finger.
Pillow Block: I’m not sure if this is the correct term, but I think it is. This is the rectangular (but with very rounded corners) piece of aluminum that supports the axle. Each one is mounted with two long bolts from under the guitar.
Axle: the round shaft that runs between the pillow blocks and on which the fingers are mounted. It is the pivot for the string fingers.
Mid-Axle Support: I have no idea what MSA or anyone else calls this, but it is the finned piece of metal that mounts to the body of the guitar in the slot for the changer and has 6 slots into which the fingers for strings 3-8 fit.
ORDER OF PARTS ON THE CHANGER AXLE:
This is based on my 2 changers, and is from the low string to the high string. While this is the order I found, IT IS IMPORTANT to disassemble your changer carefully, noting any differences between this and what I found. It is possible my changers have been disassembled and reassembled by previous owners incorrectly, although I don’t think the changers have been disassembled before:
teflon washer, metal washer, string finger, scissor finger, washer, string finger, scissor finger -
from here, the next six fingers fit into the slots of the mid-axle support, with a string finger then a scissors finger in each slot – then for string 2: string finger, scissors finger, metal washer, string finger, scissors finger, and last a teflon washer.
OTHER REFERENCES TO HELP:
Mickey Adams’ PSG Mechanics video: https://youtu.be/6GcFVpTzY0I
James Madison’s Sho-Bud refub advice (much is very similar, and this is where I started learning this stuff: https://bb.steelguitarforum.com/viewtopic.php?p=2927500#2927500
SUPPLIES NEEDED/RECOMMENDED:
Sandpaper, 400 to 2000 grit
Dry PTFE (Teflon) spray lube
Solvent (gasoline, naphtha, kerosene, or other)
Spray can of brake cleaner
Metal polish
A supply of rags
Small and med containers to hold parts, including one for holding parts in solvent
Some Scotchbrite pads
Med clamp (bar clamp or C-clamp will work)
Selection of good-quality screwdrivers – you will need phillips head ones that are not worn out to remove the bolts holding the pillow blocks.
Needle nose pliers
Work Bench – it’s much easier to work on your steel if you have a work bench. Sierra Steel’s bench is a good design if you work on different brands or types of steel. I only have the one, so I built this one out of ¾” plywood with screws and two cross-braces.
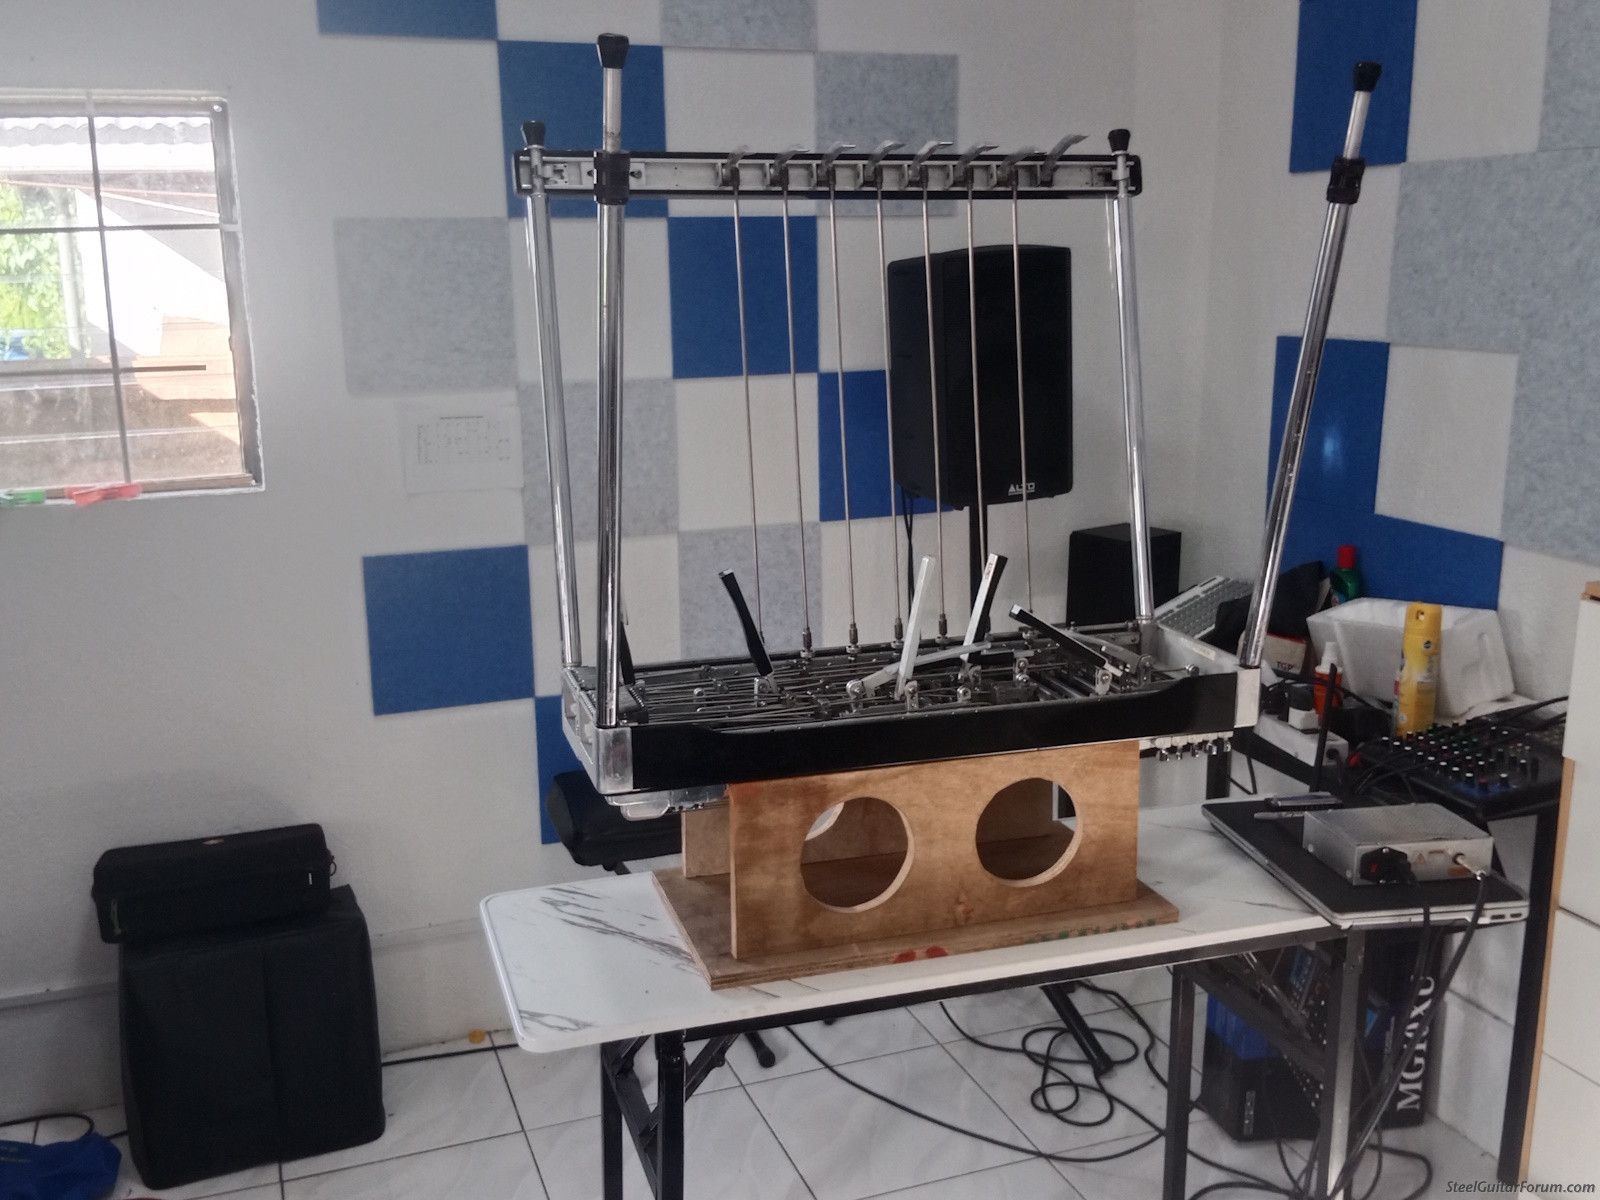
My simple work bench.
DOCUMENT: take pictures of everything, both now, and as you disassemble. You want pictures that clearly show how much tension is on each raise helper spring (this is best done after the pull rods are removed) and also the lower return springs. Might as well get pictures of the tuning nuts in the window of the end plate and also all the bell cranks just in case you miss or make a mistake on a pull rod – you can look at the pictures.
DISASSEMBLY:
Back all split screws out until they do not extend into the changer opening.
Remove all pull rods, noting which slot on the bell crank and which hole in the changer tabs I belongs. I number each hole on the bell cranks from top to bottom when the guitar is upside down. So slot 1 has the greatest amount of pull. On the changer, I note R or L for whether it is the raise or lower tab, and then which hole, also from top to bottom when upside down in my workstand. I find it’s best not to write down the details in the order of the pedals and levers, but instead, write each down as you take it off. So you might have pedal 1 first, but then perhaps a lever, because those rods are above the other pedals. Take it all part in a logical order, writing it down, and then when you put the rods back, you just reverse it, and the rods will go into place fairly easily. I do make a few notes to help get the right pull rods back in the right place, noting if there is an elbow (a bend near the end for the rod to go over others, then drop down to the right slot on the bell crank), a Z bend, or something more convoluted.
Remove all the lower return springs by backing the bolts out of the end of the springs and disconnect them from the lower finger.
Remove all raise helper springs from where they adjust (MSA used different methods at different times for how they are adjusted) and carefully remove the hook that connects to the end of the spring and to the bottom of the raise helper spring.
Remove the stop plates
Remove the two bolts that hold each pillow block in place. Carefully turn the steel over, or perhaps put a piece of masking tape on the pillow blocks so they don’t fly off – unlikely, but you don’t want to damage them. Remove the pillow blocks. If there are teflon washers on each end of the shaft, carefully remove them and put them where you won’t lose them.
I like to use a pencil or something similar to slide into the fingers as the axle slides out. You may have to twist the axle some to get is started. Also, a drop of 3 in 1 or sewing machine oil on the axle might help it slide out. Just make sure the fingers do not drop out the bottom – the pencil pushing the axle should prevent this.
Once the axle is out and all parts are hanging on the pencil, you can carefully pull the pencil out and let each finger part drop out the bottom into your hand. You might can list them out through the top, but I found the scissors finger was hanging up and did not want to force it.
I do not mark fingers for particular strings as when I am doing cleaning and polishing them I don’t think it matters which goes back where as they should all be about the same.
Once the fingers are all out, you can remove the two bolts that go through the bottom of the guitar into the mid-shaft support and remove it for polishing.
Soaking: I like to soak the finger parts in a solvent. Naptha is not available where I am in large containers, so I use gasoline. You can mix gasoline and kerosene and basically get naptha – not exactly, but similar. All three are petroleum distillates, with gasoline being the lightest, naptha being the middle, and kerosene being the heaviest. After soaking a bit in gasoline, put on some strong rubber gloves and grab an old tooth brush and scrub the parts. Work the scissors fingers repeatedly either under the gasoline, or dipping repeatedly while doing so. This is the best way to get any old lubricant and dirt out from the area of the rivet where the two pieces hinge. Once you are confident that the grime between the fingers has been removed, any oily lubricants have, you can put them out to dry. See James Morehead’s procedure, listed above, for a more involved procedure. I have done his method, but I find gasoline alone works fine and leaves no residue that I can detect. But afterwards, I use brake cleaner spray to further clean anything I see on the fingers, and spray into the rivet area, working the hinging action further to get anything missed before out. Brake cleaner supposedly does not leave any residue.
Spread out to dry.
Once dry, I use dry teflon spray lubricant and spray it into the rivet/hinge area. Make sure each finger has very smooth, easy motion for enough range to achieve the pull required.
SANDING THE FINGERS: First, inspect the sides of the fingers in case something has gotten into the changer and roughed up a side. Then, inspect the surface where the string sits looking for grooves or irregular wear on the tops of the fingers. Most like there will be some. If left, this can eventually lead to buzzing strings, so I would suggest sanding if there are any signs of roughness. If they all, or most, show signs of grooves and irregular surfaces, but nothing extreme, here is my method for sanding them: Put all the string fingers (no scissor fingers) onto the shaft, and push them together in the middle of the shaft. Lay flat on a table so all the fingers are lined up. Get a clamp that will hold all the fingers together (I used a bar clamp). PAD THE PARTS OF THE CLAMP CONTACTING THE FINGERS!!! You will need sandpaper in the grits of 400, 800, 1200, and 2000, or something similar.
You can then sand all the fingers at once, and it’s easy to keep them square to the sandpaper as a big block vs. each one individually. Place the sandpaper on a flat surface and run your block of fingers across it, rotating it slowly. Just make sure you have the fingers flat on the sandpaper before moving them, and are always rotating them as you move them across the sandpaper so you don’t create a flat spot and/or edge. Once you’ve gone through the sandpaper grits, check to see if any need additional attention, and tackle those one at a time - but be very careful to sand with the finger square to the sandpaper so you do not round the tops of the fingers. James Morehead’s suggestion about using a dremel to polish them is a good idea, but you can also do it by hand.
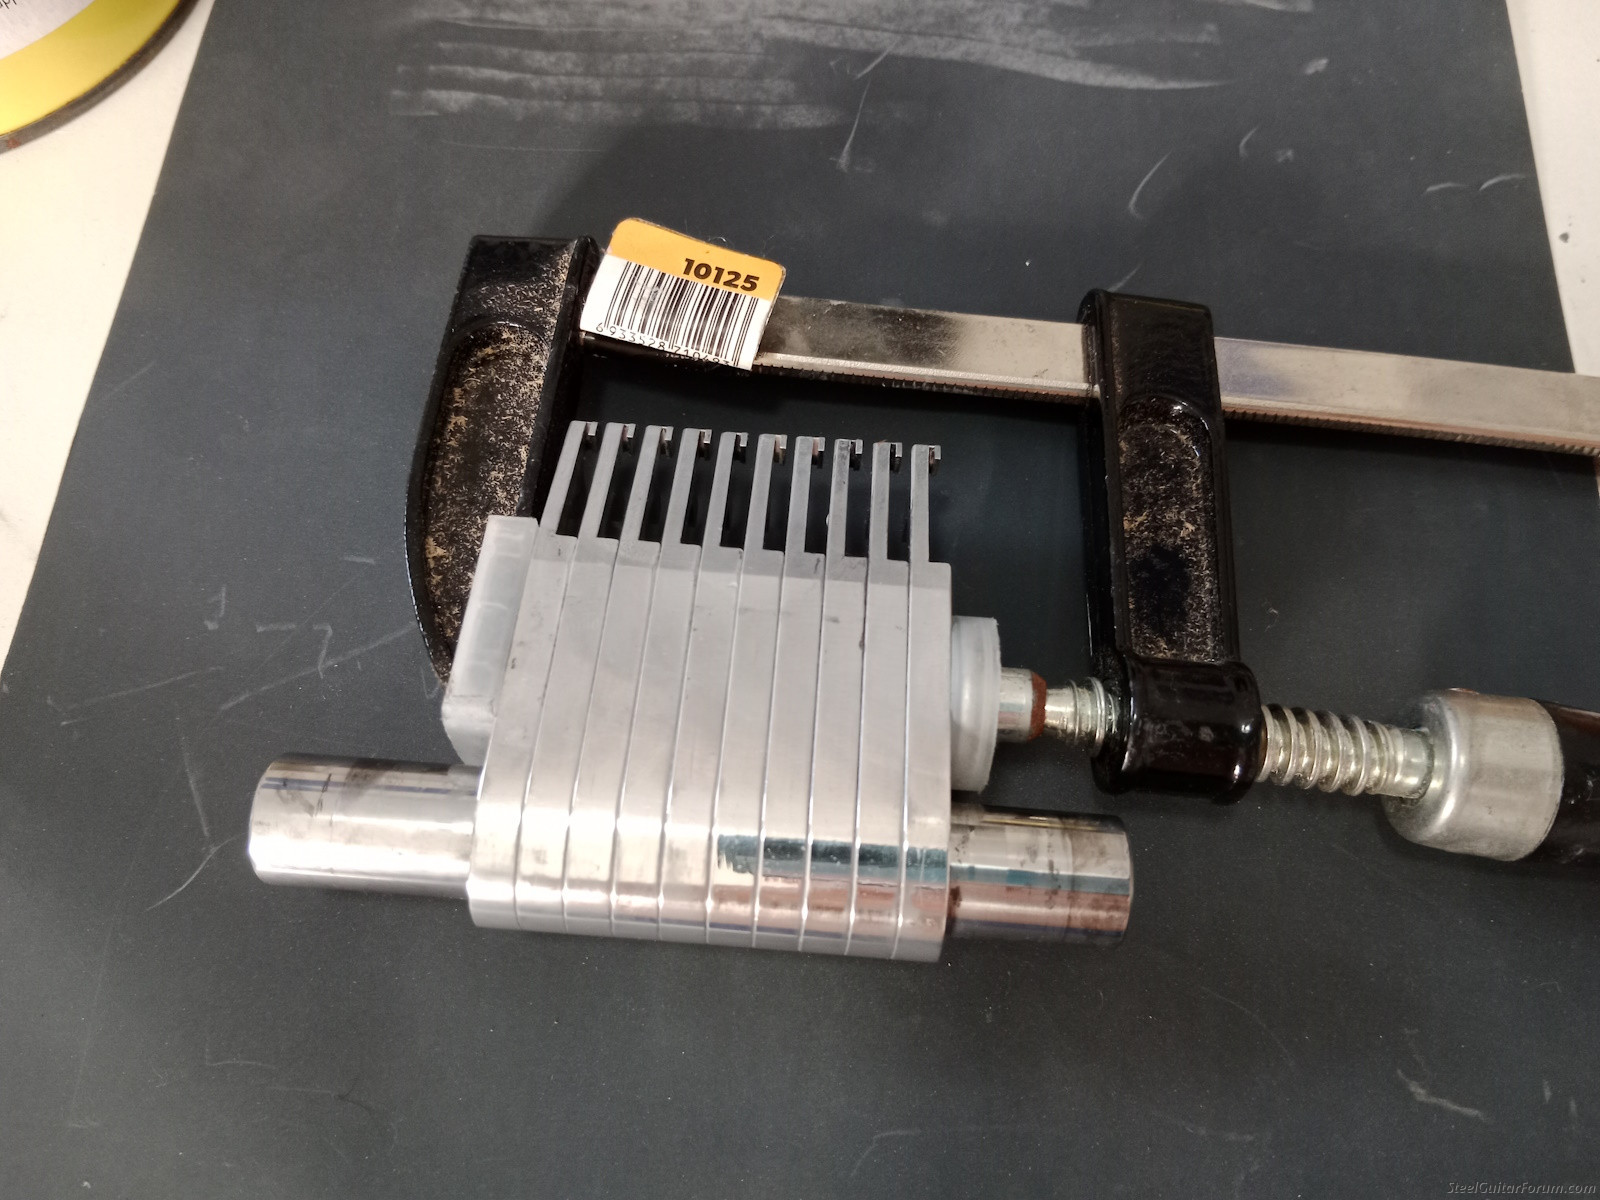
String fingers clamped together for sanding
Now is when you can clean and polish all the pull rods, cross shafts, bell cranks, and other parts. If your springs are grubby or corroded, wipe them off, and if they still seem rough, try some brake cleaner on them. My feeling is that so long as they are not corrode with the coils sticking together, I don’t worry too much about how they look. Too much cleaning could, I suppose, remove enough metal to change how effective they work. If they are too rough, contact MSA and order replacements (maybe do this BEFORE STARTING THE PROJECT! – it’s easy to inspect both sets of springs).
I did not remove cross shafts or bell cranks due to time limits, but they are pretty accessible with the pull rods out of the way. The pedal cranks are a bit harder to clean while in place, but it’s possible.
REASSEMBLY
It’s pretty much the reverse of the disassembly, but here’s a few pointers. I found it easiest to reassemble the changers with the guitar upright on it’s legs. Spray teflon lubricant onto the axle. I did not use a pencil to reassemble, just slid the axle through each piece as needed. Remember that any two fingers that do not have a fin of the mid-shaft support between them has a metal washer to maintain proper spacing (strings 10 and 9, and 1 and 2 on my 10-string steel). I found it easiest to slide the string finger in from the top, slide the axle into it, then slide the scissors finger up from underneath, and again slide the axle into it. Remember the teflon washers that go between the outer most items on the axle and pillow blocks, then put the pillow blocks on. Then install the bolts that hold the pillow blocks – either climb under the steel or again, tape or carefully turn it over onto your workbench.
Balance Springs: If you are going back with the same copedent and were happy with it, just use your photos and put them back the same. If, however, you are changing the copedent, I will tell you what I know, but it's not much. Many people find they can not lower a string more than a 1/2 step that has a balance spring on it
https://bb.steelguitarforum.com/viewtopic.php?t=367324). When I reassembled my changer, I had very little info on these strings, so I decided to only put them on strings that raise but have no lowers on them. Since then I have gotten a reply to an inquiry from Mitchell Smithey at MSA, and here's what he said:
| Quote: |
Hi Doug, we call them balance springs and at low tension they take a bit of tension out of the changer scissor caused by the rivet holding them together. Just a little pull takes some pressure off the rivet. Some string gauges prefer not to have balance springs, like the .024 G on C6 and the big low string on C6. You can also tighten them all the way on the high F# and G# if there are no lowers involved. ⚠️ It is possible to ruin a good setup by indiscriminately moving those springs around without a good reason, I’ve seen it happen!
Hope that helps! Mitchell |
Once the changers are back together, you can spray them lightly with the teflon lubrication, working the fingers around so the surfaces between each part gets some teflon. Then continue reassembling – add the springs, then start re-rodding it using your notes from disassembly.
PEDAL STOP ADJUSTMENT
You don’t need to deal with this to clean the changer, but you might find this info useful if you are changing the copedent on an MSA as you may find you need to adjust the pedal stop to either remove excess play or to gain throw to get the pulls you want.
To adjust the pedal stop, you flip the guitar over (in it’s case, or on a stand) and remove the pedal rod for the pedal you want to adjust. Then, remove the knurled knob that adjusts the pedal rod length – it is still on the guitar. Keep turning it counterclockwise to remove it. Once it’s off you will see a second, smaller hole right beside the hole the threaded part of the adjuster goes in. You need a 1/16 inch allen wrench to adjust this. Counterclockwise increases the throw of the pedal, clockwise decreases.

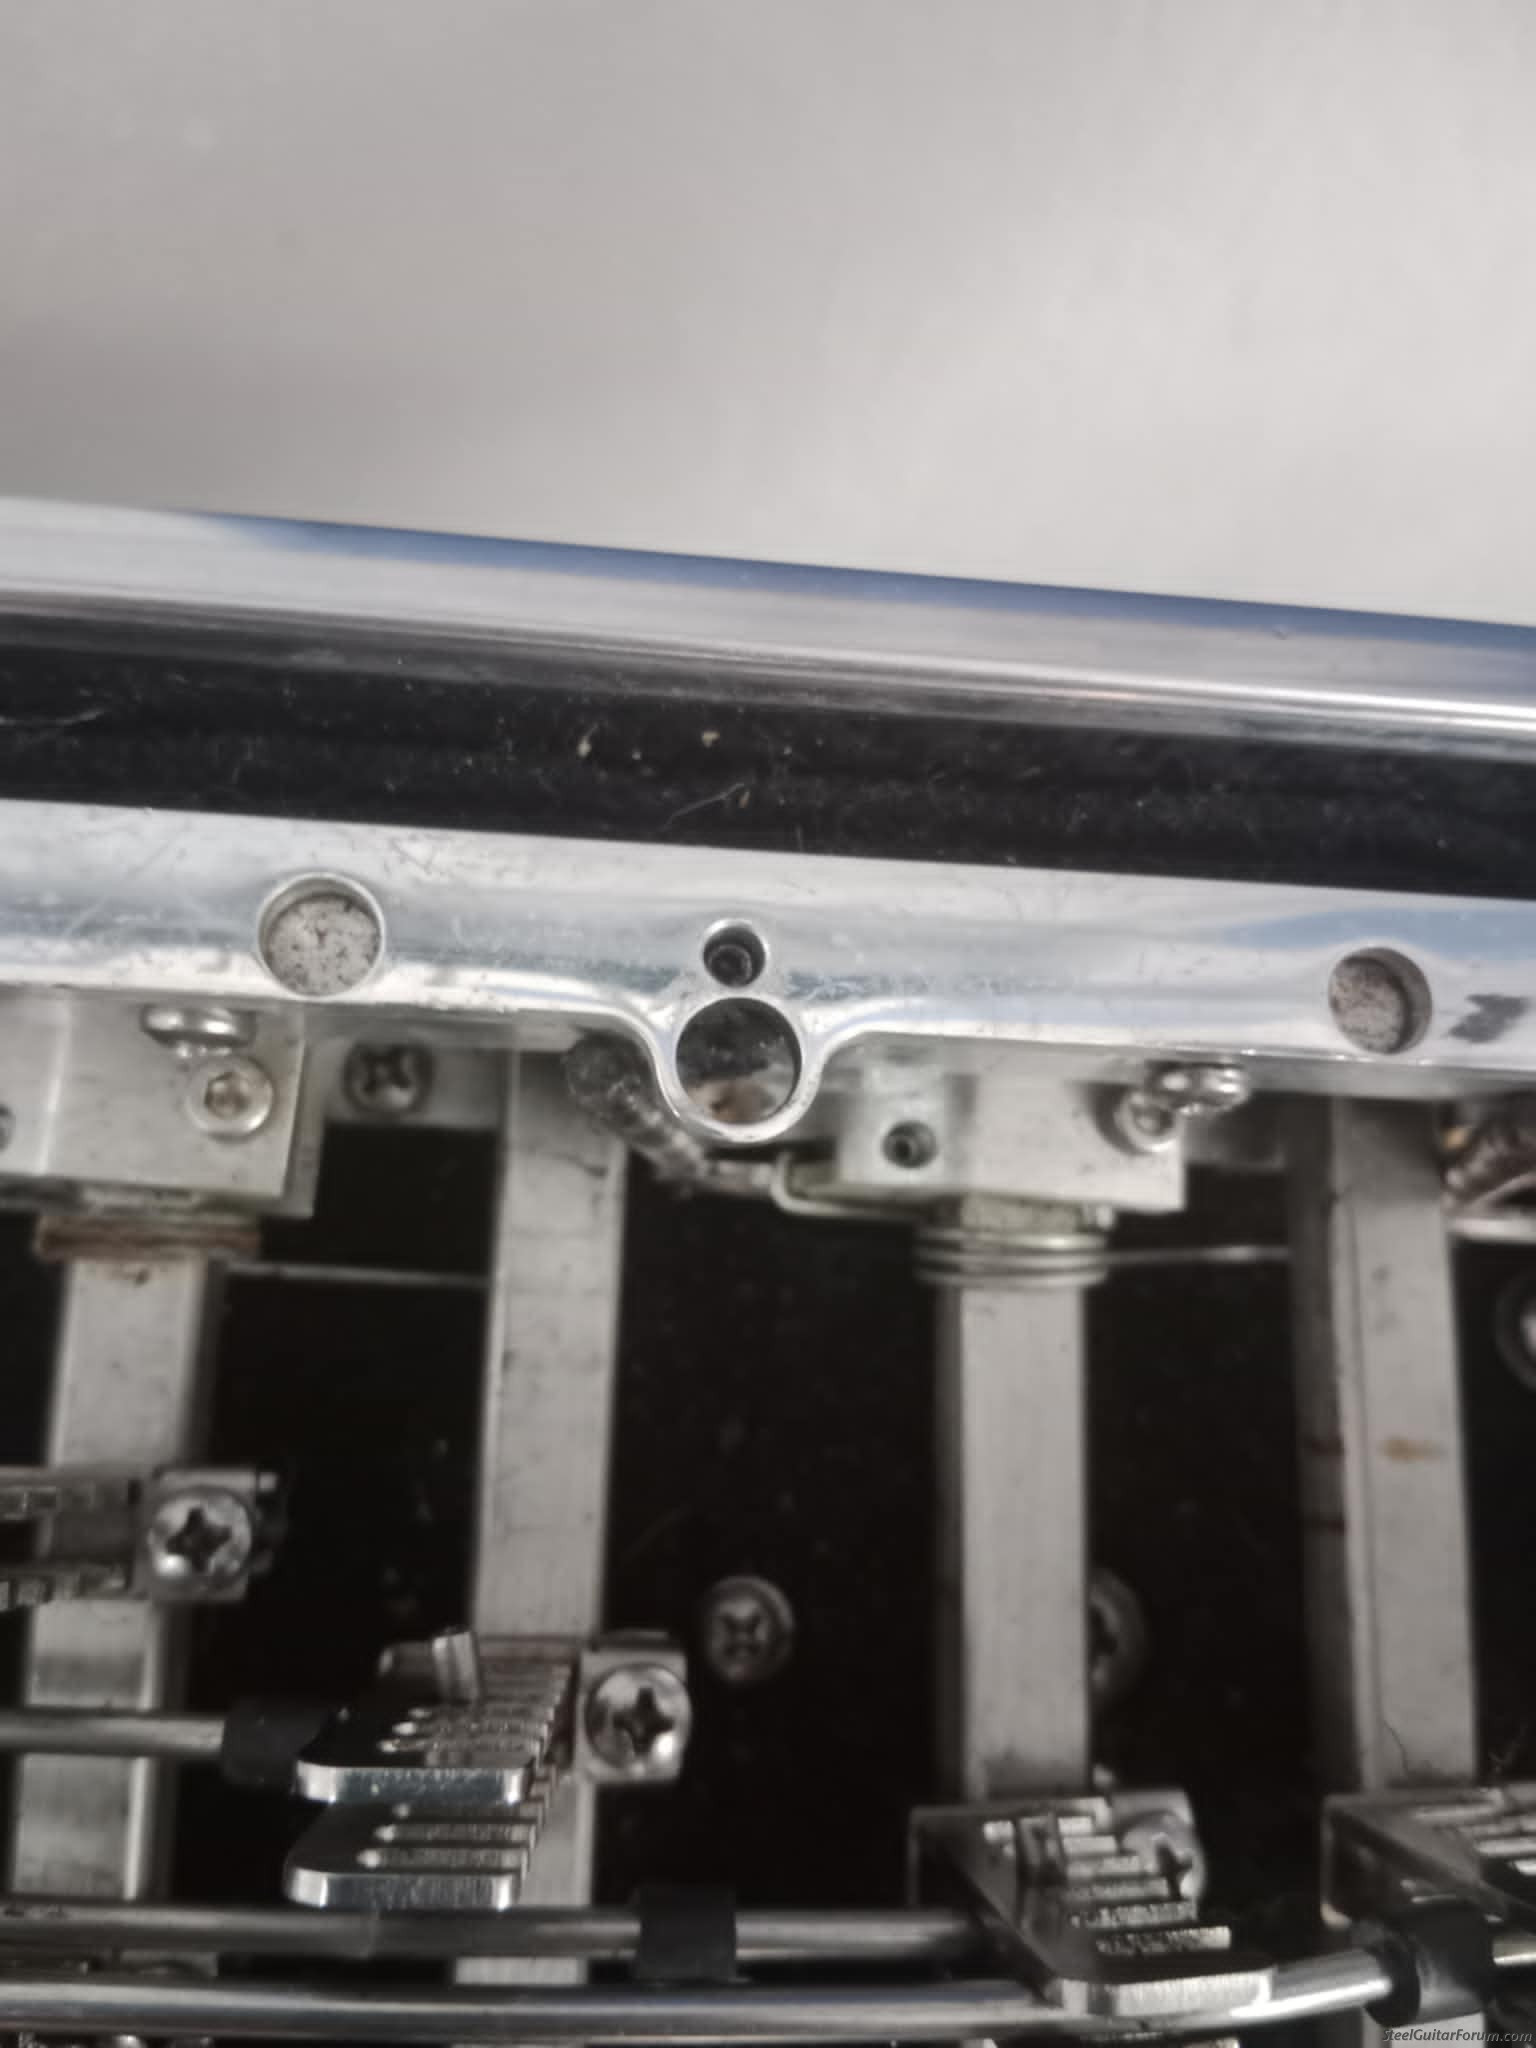
Top picture shows the knurled knob, with the allen bolt that is the stop behind it circled in red. Second picture shows the large hole the knurled knob sits in and the smaller hole right beside it that gives access to the top of the allen bolt.
_________________
Bringing steel guitar to the bukid of Negros Oriental! |
|