| Author |
Topic: IVL Steel Rider Repair - Tips |
Bob Lawrence
From:
Beaver Bank, Nova Scotia, Canada
|
 Posted 18 Jul 2009 10:10 am
 |
|
I have a IVL Steel Rider that belongs to Ronnie Miller(Charlie Pride Band), Texas. and it has an unknown problem with the main board. When the floor pedal is plugged in it flashes the LED's continuously. He's has a similar problem in the past(about a year ago) but when we swamped out the main Microcontroller on the Main Board,(bottom board) it returned to normal. This time I have no idea why it's acting up but will try a few basic tests.
To be honest, our chances of a successful repair are slim but that doesn't mean that we can't try. Also by posting here we may get comments from someone else that has had similar experience or a few tips or ideas to try. Feel free to comment but please don't go off topic so that we can keep this for a reference without reading about a bunch of unrelated topics.
Last edited by Bob Lawrence on 19 Aug 2009 4:43 pm; edited 2 times in total |
|
|
 |
Bob Lawrence
From:
Beaver Bank, Nova Scotia, Canada
|
Posted 18 Jul 2009 10:11 am Q/a
|
|
Q/A
Q: What is a IVL steel Rider?:
A:The IVL Steel Rider is a Pitch to MIDI converter for Steel Guitar). A complete system also inclides 2 pre-amps (for the pickup) and a special 10 or 12 string MIDI pickup)
Q: Can you still purchase a new IVL Steel Rider?
A: No, They haven't made any for over 20 years.(I'm guessing a bit about the number of years)
Q: Can you still purchase Steel Rider parts? I.e Main board, Slave board, Piggyback board?
A: No, They haven't made any for over 20 years.(I'm guessing a bit about the number of years) however, you can still purchase individual parts such as voltage regulators, Microcontrollers,08031ADC Analog to Digital converters , basic logic chips such as (74LS174N, 74HC14, etc..) Capacitors, resistors etc.
Q: Are the Main board, Slave board, Piggyback board repairable?
: Yes and no. Some of the integrated circuits are in sockets(Microtrollers, EPROMS(Slaves and a Master)
What are the Slave and Master EPROM chips used for? EPROMS can store information permanently, even when there is no power ( same idea as a hard drive on a computer but a very limited amount of info can be stored) They store the programming code required by the microcontrollers)
Last edited by Bob Lawrence on 19 Aug 2009 4:43 pm; edited 2 times in total |
|
|
|
Bob Lawrence
From:
Beaver Bank, Nova Scotia, Canada
|
Posted 18 Jul 2009 10:11 am References
|
|
Reference:
Main board = bottom IVL Pitch to MIDI converter board
Slave Board = Top IVL Pitch to MIDI converter board
Pictures: As I go through each stage I will post pictures when I can.
IVL repair centres or repair techs: There are a few guys that I've heard about but none that I know and I'm not sure if there is anyone else active at this time.
Part: Microcontrollers are still available but are getting harder to find. The minimum order is usually $US200 to $US500 , if you only need one it could be expensive.
Last edited by Bob Lawrence on 19 Aug 2009 4:44 pm; edited 2 times in total |
|
|
|
Bob Lawrence
From:
Beaver Bank, Nova Scotia, Canada
|
Posted 18 Jul 2009 10:12 am Theory Of Operation
|
|
THEORY OF OPERATION - Basic overview
Note: This section is not complete. Corrections and additions will be added later.
==================================================
Knowing the basic theory through each stage can be very helpful for troubleshooting.
Pitch To MIDI Converter Box: 10 string model
LOW PASS FILTERS (LPF):
- The LPF reduces the complexity of the signal by attenuation of the harmonic frequencies and leaving the fundamental frequency in tact.
- THE LPF also Removes the high frequency component and minimizes a form of distortion known as aliasing, (distortion) which improves the signal for analysis
- The LPF is a 3 pole filter.
- The LPF has a 40db of attenuation.
- Frequency Cutoff: 6.25 khZ - anything above this frequency is attunated by the LPF
GAIN CONTROL AMP:
- Controlled by the MPU
- 8 steps of gain by a factor of 2 for each step.
- Gain range = 2 to 256
- At the start of analysis the gain control amp is set at the max value.
- Chain: [Filter] ->[gain control amp] --> [ADC] --> [analyze waveform] -> Determine Pitch -> Output MIDI note/s
Analog to digital conversion - ADC8031 (A complete Spec sheet is available from www.National.com)
- ADC8031 - 8 pin DIP - IC
- 8-bit successive approximation A/D converters with a serial I/O and configurable input multiplexers ( 8 bit) .The signal is represented by values ranging from 0 to 256.
- Serial I/O A/D Converters
- Sampling Rate: must be twice (2X) the highest frequency component.
- 5 VDC voltage reference
- 0V to 5V input range with single 5V power supply
- ADC Data conversion time: 32 micro secs.
- Max Sample Rate:0.031 MSPS
- Max KSample Rate: 31 ksps
- Min Supply Voltage: 4.5 Volt
- Max Supply Voltage: 6.3 Volt
- Input Sample/Hold:No
- Temperature Min: -40 deg C
- Temperature Min: 85 deg C
- Low Power:15 mW
Last edited by Bob Lawrence on 19 Aug 2009 4:45 pm; edited 2 times in total |
|
|
|
Bob Lawrence
From:
Beaver Bank, Nova Scotia, Canada
|
Posted 18 Jul 2009 10:27 am Quick Tests - Basic Troubleshooting in the field
|
|
Quick tests that have been tried so far and the results:
- Tested the pedal board in another IVL unit and it stops flashing, which demonstrates that Ronnie's unit has a problem.
- I removed the slave board (top board) from the main pitch to midi converter so it can't have any effect.
- The regulator voltage on the main board (pitch to midi converter)which seems ok.(I'll retest it again, after a lomnger warm up time to be sure )
- Re-seated all of the removable chips(mounted in sockets) on the main board.
- Tried swapping out(replacing) all of the removable chips(in sockets) including those on the daughter board i.e. The main microcontroller and EPROM (Master)
- Removed the glue from the daughter board and removed the board to re-seat it in it's socket. He's lucky that this daughter board is in sockets. The earlier ones were soldered in, which makes repairs more difficult.
My next step is too use a microscope to check for fractured or cold solder joints on the daughter board and the main board. The belly of an air plane can put a lot of stress on electronic equipment, not to mention the shocks it can receive from baggage handlers, during transport. You also have stresses such as temperature and humidity in the various locations. When Ronnie left Texas it was around 105 degrees F. Nova Scotia was around 60 degrees F. That in itself can stress electronic components.
Last edited by Bob Lawrence on 19 Aug 2009 4:46 pm; edited 1 time in total |
|
|
|
John Billings
From:
Ohio, USA
|
Posted 18 Jul 2009 1:29 pm
|
|
| If you had an earlier model, and had to replace a chip, would you add a socket at that time? Or are there space constraints? |
|
|
|
Bob Lawrence
From:
Beaver Bank, Nova Scotia, Canada
|
Posted 18 Jul 2009 1:54 pm Sockets
|
|
@John,
If I removed a daughter board from an old master board I would definitely use sockets to put it back in.(if I could find the correct type) There's room to do it. Also, I would use sockets for any socket-less chip that I had to be replace (room permitting) Generally speaking room for a socket is not a problem. I think that in later designs or revisions the team at IVL realized that it wasn't practical(but probably not impossible) to repair a unit if you have to unsolder the daughter board and re-solder it again. A little too much heat on those boards and the traces lift. Loose traces and you have to add jumper wires and it gets messy and prone to wires breaking due to vibration or handling of the boards.
Last edited by Bob Lawrence on 19 Aug 2009 4:47 pm; edited 2 times in total |
|
|
|
Bob Lawrence
From:
Beaver Bank, Nova Scotia, Canada
|
Posted 18 Jul 2009 1:59 pm Pictures - IVL Pitch to MIDI Converter
|
|
Daughter Board: The daughter board holds the Master Controller and Master EPROM) It allows expansion to a second board (the slave or top board).

Daughter Board - Bottom (note the sockets, socket pins)

28 pin and 40 pin dip socket (used to protect the pins opf the daughter board during handeling. If you flip the daughter board over, there is little direct pressure on the pins and it will prevent them from being misaligned or bent. You can cut the socket protector pins or fold them. In the picture I did one of each. I keep a set around and use them from project to project.

Protection sockets added to the daughter board pins

Checking the Daughter Board with a microscope. Looking for cold solder joints, creaks in the board or solder joints, bad traces etc..

Master Board (Master Board)

Salve Board(Top)

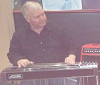
Floor Pedal: Allows you to control the Pitch to Midi Controller and select various patches that are pre-programed.

Last edited by Bob Lawrence on 18 Jul 2009 3:45 pm; edited 6 times in total |
|
|
|
John Billings
From:
Ohio, USA
|
Posted 18 Jul 2009 2:02 pm
|
|
| Thanks Bob. The pictures make it clear. I have a friend who has an old one, and he's afraid to take it out of his home studio. |
|
|
|
Bob Lawrence
From:
Beaver Bank, Nova Scotia, Canada
|
Posted 18 Jul 2009 3:49 pm @John
|
|
re: The pictures make it clear.
Anytime John. Hopefully we can all learn and benefit from this experience. More picture will be add as we go along. Stay tuned.  |
|
|
|
Brian Kurlychek
From:
Maine, USA
|
Posted 18 Jul 2009 5:21 pm
|
|
I'm sure you've already done it, but - Have you changed that battery?
_________________
We live to play another day. |
|
|
|
Russ Wever
From:
Kansas City
|
Posted 18 Jul 2009 11:29 pm
|
|
I suggest you contact Chuck Abend, who
posts around here from time-to-time.
Chuck has worked on IVL
Steelriders through the years.
I have taken mine to him.
Chuck also has successfully
hand-built midi pickups
for pedalsteel.
He may have
some information
useful to you.
~Russ |
|
|
|
Bob Lawrence
From:
Beaver Bank, Nova Scotia, Canada
|
Posted 19 Jul 2009 3:28 pm IVL Pedal Board Parts List
|
|
When you don't have a schematic or manual all you can do is make a parts list and try to figure out basic functions from there. 
QTY Part Number
----------------------------------------------------------------------------------------------------------------
1 M74HC151B1R - 8 CHANNEL MULTIPLEXER - STMicroelectronics
1 TC74HC123AP - DUAL RETRIGGERABLE MONOSTABLE MULTIVIBRATOR - Toshiba Semiconductor
1 74HC74 - Dual D-type flip-flop with set and reset; positive-edge trigger - NXP Semiconductors
1 HD74HC595P 8-bit Shift Register/Latch (with 3-state outputs)
1 HD74HC595P - 8-bit Shift Register/Latch (with 3-state outputs) - Renesas Technology Corp
2 SCL4511B - CMOS BCD-TO-SEVEN SEGMENT LATCH/DECODER/DRIVER - ETC
4 2N3904 Gen Purpose Transistor
1 8530 - Dioide |
|
|
|
Bob Lawrence
From:
Beaver Bank, Nova Scotia, Canada
|
Posted 19 Jul 2009 3:39 pm Re: feedback
|
|
@Brian
re:Have you changed that battery?
The battery only holds the info for the programamable RAM chip. I did remove to clear the program memory as part of a hardware re-set. I haven't put it back in yet. Thanks! for the feedback.
@Russ
Re: I suggest you contact Chuck Abend,
Yes, thanks. I have his name in my files form a few years back. He did a great job making those pickups. |
|
|
|
Bob Lawrence
From:
Beaver Bank, Nova Scotia, Canada
|
Posted 20 Jul 2009 5:02 am Update : IVL Repair
|
|
Master Board is triggering:
While Ronnie is on the move I update info here for him so that he is aware of the progress.
1. Main Board: Testing with the pedal baord connected: After checking what I could with a volt meter, logic probe and an Oscillscope the only think I could find wrong was that the voltage regulator would drop to less than 3 volts( after a warm up period) with everything connected , (including the floor pedal) I decided to change the 5 volt voltage regulator and re-test.
Master board re-testing without the pedal borad connected:
The bottom board is triggering and everything seems normal without the floor pedal but I'm in the early stages of re-testing. . The only thing I changed on it so far is the voltage reguator.
There were a few weird piano sounds coming out of the sound module but that turned out to be just my playing 
If the test holds I will add the top board tonight
and try the test again. |
|
|
|
John Billings
From:
Ohio, USA
|
Posted 20 Jul 2009 5:15 am
|
|
Bob,
Another thing my friend complains about, though not related to your investigation, is that the cord connecting the pickup to the other components is very "flimsy", and has given him problems. |
|
|
|
Bob Lawrence
From:
Beaver Bank, Nova Scotia, Canada
|
Posted 22 Jul 2009 6:59 am IVL Pickups - Preamps
|
|
John,
Yes , they can be problematic for sure. I've repaired a few IVL pickups with the aid of a microscope.The coils are so tiny I can just barely handle them.
Easy Pickup test:
I get calls about how to troubleshoot the pickup vrs the preamp or pitch converter. All you have to remember is even though the pickup is designed to operate in a MIDI system, it's still only made up of coils of wire and magnets like any other pickup. There's 10 coils in one unit(10 string) or 12 in a 12 string pickup. You can use a Radio Shack 1/4 inch audio jack(same as what the use on you steel guitar) and solder to alligator clips to it. Then run a regular guitar chord to your amp(turn down your amp volume) and connect the alligator clips to each coil(one at a time). Pluck a string and listen for audio. If the coil is open or the wire is bad you'll get nothing. If you get sound it should be ok. Then you can wiggle wires to see if it's intermittent.
Pickup Tester: I designed this myself:

IVL Pickup:

IVL Pickup adn pre-amp combo:

Preamp Test(Capacitor ESR):

IVL Pickup - Inductance test :

Some Pictures of a Hombrew pickup
Home-brew Preamps(hand wired):

Home brew pickup - (Case mounted - internal)

Homebrew pickup - (Case mounted - external)

Last edited by Bob Lawrence on 19 Aug 2009 4:35 pm; edited 2 times in total |
|
|
|
Donny Hinson
From:
Glen Burnie, Md. U.S.A.
|
Posted 23 Jul 2009 7:51 am
|
|
| As a matter of course, I'd be suspecting all the small electrolytic capacitors in there (looks like quite a few of them). Once they get over 10-15 years old, they tend to become problematic...especially if the unit sat idle for any length of time. |
|
|
|
Bob Lawrence
From:
Beaver Bank, Nova Scotia, Canada
|
Posted 26 Jul 2009 7:53 am Capacitors: The Arrhenius equation
|
|
@Donny
Re:I'd be suspecting all the small electrolytic capacitors in there (looks like quite a few of them). Once they get over 10-15 years old, they tend to become problematic...especially if the unit sat idle for any length of time.
Yes absolutely although, I have always used about a 20 year time frame. In this case it's irrelevant because most of the units are expected to be 20 plus years old.
The Large Power Supply electrolytic capacitor(10,000 UF / 25 V):
If the pitch converter is sitting around too long the caps can draw so much current on power up that can can cause damage to other components on the board. Also the large electrolytic (CAN) capacitor is glued to the board on one end. Through vibration it can come loose , touch other components and cause a short somewhere on the board.
Preamp Capacitors: I keep a stock of the 10UF /25V capacitors and have been swapping them out as I repair the preamps (by usually replacing the surface mounted (SMD) LM324 chips) I repaired two preamps for Ronnie (over years ago) with all new capacitors. The capacitor change wasn't necessary due to some fault, just precautionary.
How to predict the failure time frame. It's temperature and voltage dependent. The internal temperature of a capacitor changes whether because of ambient temperature changes or as a result of internal heating.In general it is accepted that the chemical - physical property degrading process follows the Arrhenius equation.
Arrhenius equation From Wikipedia, the free encyclopedia
The Arrhenius equation is a simple, but remarkably accurate, formula for the temperature dependence of the rate constant, and therefore, rate of a chemical reaction.[1] The equation was first proposed by the Dutch chemist J. H. van 't Hoff in 1884; five years later in 1889, the Swedish chemist Svante Arrhenius provided a physical justification and interpretation for it. Nowadays it is best seen as an empirical relationship.[2] It can be used to model the temperature-variance of diffusion coefficients, population of crystal vacancies, creep rates, and many other thermally-induced processes/reactions.
A historically useful generalization supported by the Arrhenius equation is that, for many common chemical reactions at room temperature, the reaction rate doubles for every 10 degree Celsius increase in temperature.[3]
Why don't I apply the formula to figure out the failure time frame? With the lack of sunshine in Nova Scotia this summer (vitamin D)It's easier to replace the capacitors
Last edited by Bob Lawrence on 19 Aug 2009 4:32 pm; edited 1 time in total |
|
|
|
Scott Appleton
From:
Ashland, Oregon
|
Posted 26 Jul 2009 9:32 am Ivl
|
|
After the 4th time mine failed I junked it .. worked for about 4 years the first time and failed every 3 or 4 weeks after that .. its been gone for 14 years now and I
don't miss it .. I use a modified Roland unit and just track the center 6 strings
.. gives me all i need in the way of chord and harmony work. good luck .IVL
was such a good idea .. too bad no one cared enough to keep Pitchrider a working product. |
|
|
|
Bob Lawrence
From:
Beaver Bank, Nova Scotia, Canada
|
Posted 30 Jul 2009 5:31 pm Are they garbage?
|
|
@Scott
Re:After the 4th time mine failed I junked it .
Yes, they can be a challenge to keep running. Personally I don't enjoy working on them because so many things can go wrong.
*** If anyone has one that's junk we still need spare parts to keep a few of them running. |
|
|
|
Bob Lawrence
From:
Beaver Bank, Nova Scotia, Canada
|
Posted 30 Jul 2009 6:07 pm Repair update July 30th
|
|
We've only had a very few days of sun in Nova Scotia this summer, mostly rain and fog.  and unfortunately I've been down with a fairly strong head cold for the past week+ and didn't get much done.(except study the schematics) and unfortunately I've been down with a fairly strong head cold for the past week+ and didn't get much done.(except study the schematics)
I've repaired/replaced everything I could find wrong(so far):
- Replaced a 7805V Regulator chip(Master Board)
- Replaced 1 microcontroller chip(Slave Board)
- Replaced a frayed cable(Master Board)
- Glue guned the bottom 8 pin DIN jack(Master Board)
- Removed the glue/poxy(not sure what it is) from the daughter board to re-seat it. - - - While I had the daughter board removed I used a microscope to review the solder connections and repaired a few suspect solder connections on it.
Everything seems to be running ok on the work bench. I put everything back together to conduct additional test with the pickup and preamps attached. Both boards are now triggering. The pedal board doesn't flash anymore but when it's plugged in I get some false triggering on a couple of strings. With everything back in the case I can run the unit at normal temperatures and see what additional problems that crop up. More to follow. |
|
|
|
Bob Lawrence
From:
Beaver Bank, Nova Scotia, Canada
|
Posted 15 Aug 2009 2:34 pm Everything seems to be working great
|
|
Ronnie called today and talked me through a few pedal bodard programming setups, that he uses . The pedal board seems normal. Everything seems to be working and triggering fine. Unless something else pops up in the next few weeks (while I keep testing), this case is closed.  |
|
|
|
John Billings
From:
Ohio, USA
|
Posted 15 Aug 2009 3:03 pm
|
|
| It;s been interesting Bob! Thanks. |
|
|
|
Bob Lawrence
From:
Beaver Bank, Nova Scotia, Canada
|
Posted 15 Aug 2009 3:07 pm Preamp Testing - Go - No Go
|
|
Signal Injection(input) and Oscilloscope Monitoring(output), 1 pin (string channel) at a time.
Use a Signal Generator - Inject a square wave into the preamp inputs(one at a time) Monitoring the outputs on an Oscilloscope. You can use a sine wave as well. When you pluck a guitar string the note is not a pure sine wave and is best simulated with a square wave. I used a 300 Hz tone between 1.5 and 3 volts peak to peak.
Requirements: 8 pin DIN connector, Colours wired to match the inputs.(black - gnd, White, Yellow,N/C, Black, Red, Blue, Green(common)
Wire up a 5 volt voltage regulator. 7805. Feed the input with a 9 Volt battery. (left connector) Middle connector to Ground. Right Output +5 volt to +5v connection on the 8 pin DIN connector.
I will add a picture later and Oscilloscope patterns.
================================================
Also, I'm fairly lazy and changing pins one at a time is way too much work so I will try to make an automated tester that can test all inputs and outputs at a time. So far I have a Microcontroller(computer on a chip) programmed to output 6(12 string preamp) 5 (10 string preamp)
square waves at once.(this part is working) I still have to switch to test the outputs (one at a time) but I'm working on the second half of the design. (It may take a while to figure something out) Worst case I could use a rotary switch to change the output pins to the Oscilloscope. I would prefer to add a AD (analog to digital) converter and output the pattern to a TV screen or VGA monitor) Even better I would like to output all of the patterns at once.
Last edited by Bob Lawrence on 19 Aug 2009 5:07 pm; edited 2 times in total |
|
|
|